1、配置 keycloak
创建 test 域(Realm):

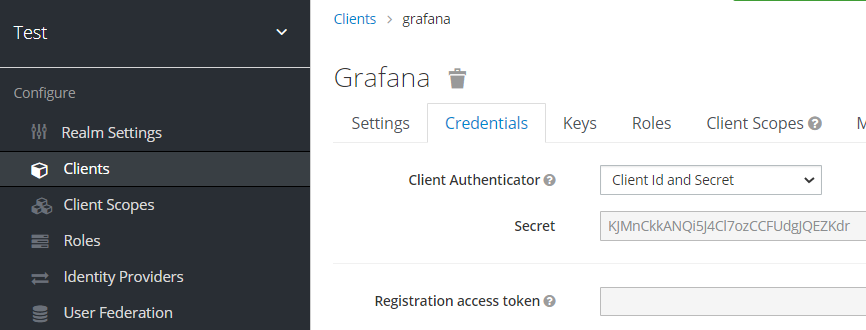
在 test 域下,创建 client,命名为 grafana。Root URL 填写为 grafana 地址。

修改 grafana 客户端其它信息。访问类型选择 confidential,即客户端需要密钥才能启动登录协议。其它选项使用默认的。

查看 client secret,后面配置 grafana 需要用到。
创建用户。注意一定要配置 email,因为 grafana 用到了用户的 email 做为登录用户。
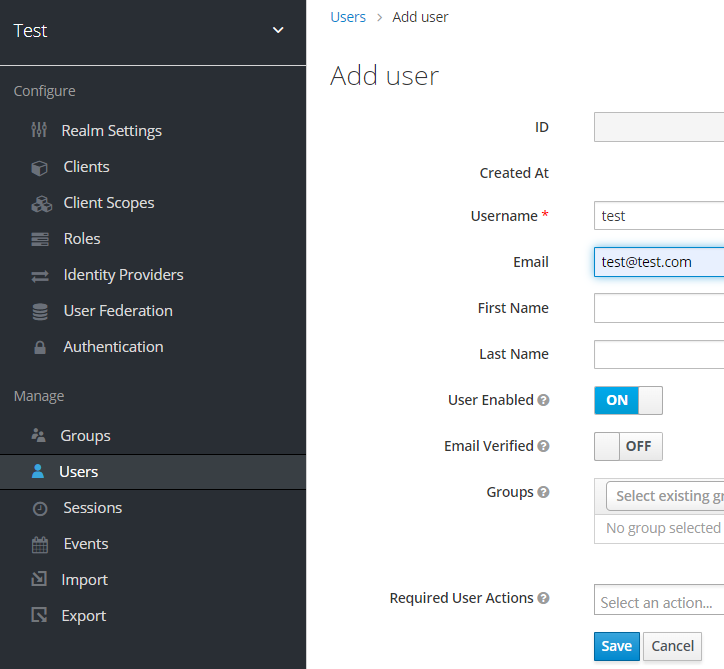
给用户设置密码。Temporary 选择 OFF,如果启用,则用户在下次登录时必须修改密码。

2、配置garfana
官方文档:https://grafana.com/docs/grafana/latest/auth/generic-oauth/
修改 grafana 配置:
[server]
# 此 url 用于重定向,如果不设置,跳转会有问题。
root_url = http://10.0.0.91:3000/

[auth.generic_oauth]
# 开启 oauth
enabled = true
# 域名称
name = test
# 登录成功后是否能注册账号到 grafana
allow_sign_up = true
# 客户端id
client_id = grafana
# 客户端密钥
client_secret = Wbd4RZiVfaT6jas1rKdAptFSdsmpnrJC
# email 表示授权 grafana 读取用户 email 信息的权限
# 这个不是随便填写的,可以在 keycloak test 域的 Client Scopes 中看到
scopes = openid email
auth_url = http://10.0.0.91:8080/realms/test/protocol/openid-connect/auth
token_url = http://10.0.0.91:8080/realms/test/protocol/openid-connect/token
api_url = http://10.0.0.91:8080/realms/test/protocol/openid-connect/userinfo
上述的部分信息,我们可以请求接口获取
[root@test01 ~]# curl -s 10.0.0.91:8080/realms/test/.well-known/openid-configuration | jq | head -n 6
{
  "issuer": "http://10.0.0.91:8080/realms/test",
  "authorization_endpoint": "http://10.0.0.91:8080/realms/test/protocol/openid-connect/auth",
  "token_endpoint": "http://10.0.0.91:8080/realms/test/protocol/openid-connect/token",
  "introspection_endpoint": "http://10.0.0.91:8080/realms/test/protocol/openid-connect/token/introspect",
  "userinfo_endpoint": "http://10.0.0.91:8080/realms/test/protocol/openid-connect/userinfo",
填写好重启下 grafana 就可以了。
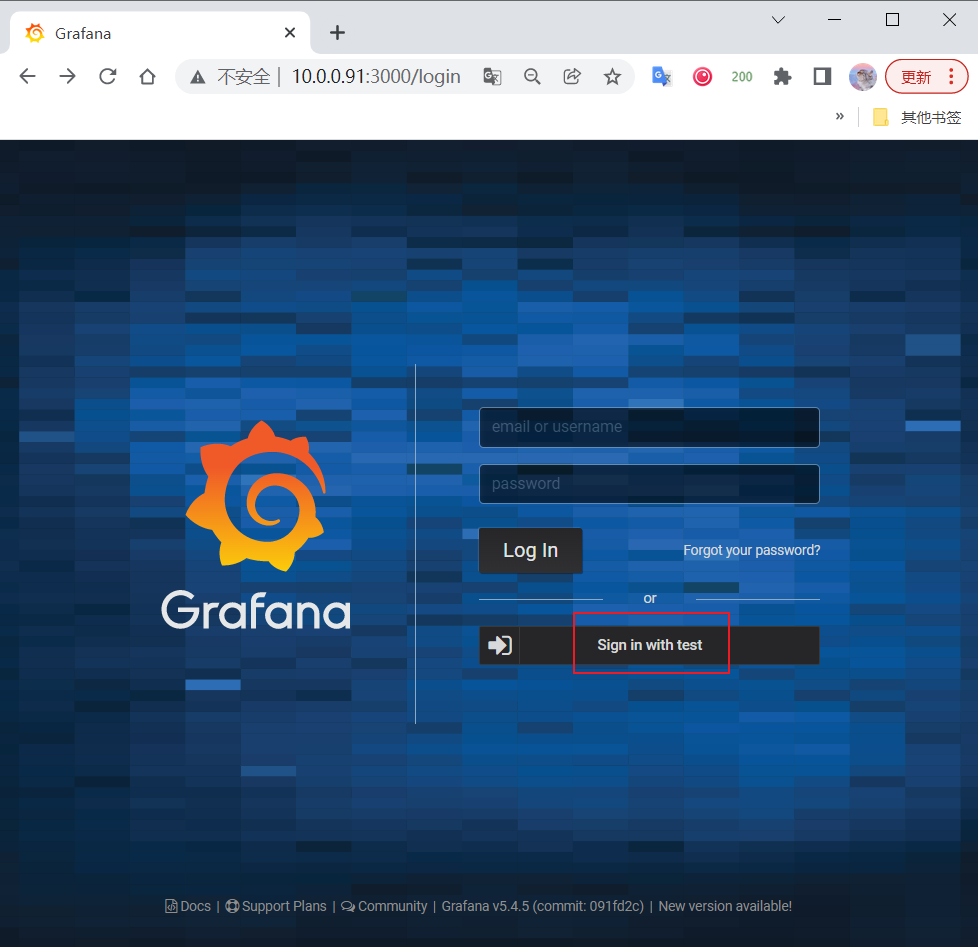
3、登录验证
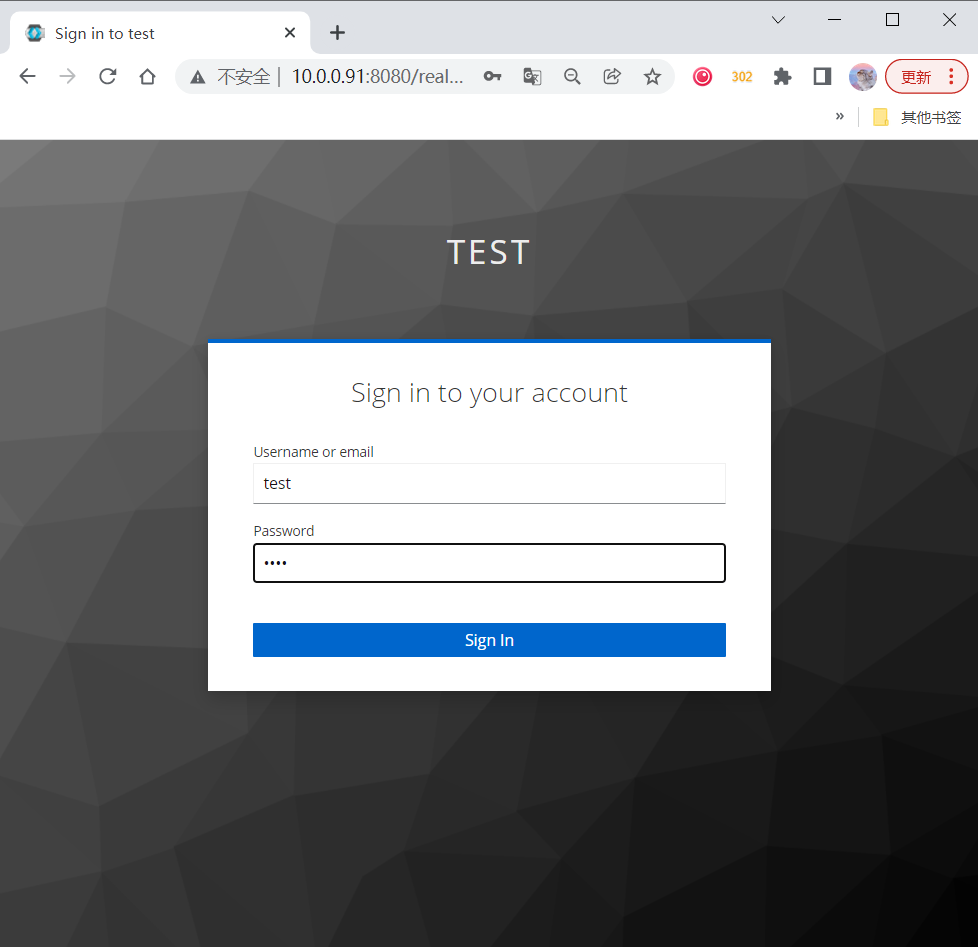
访问 grafana 地址 ,登录界面能看到 Sign in with test,点击即跳转到 Keycloak 登录界面。
域为test,使用前面创建的账号密码登录。
登录验证成功就会跳转回 grafana,可以看到用户名为我们为用户设置的 email,用户角色默认为 Viewer。
